Are you wondering how celestial objects look like when observed closely? A telescope is your biggest friend if you love to explore the night sky. However, not many newcomers to astronomy know how to use a telescope properly. But you need not worry. We are going to provide a detailed step by step beginner friendly guide for you to set up and use your telescope without any hassle.
You will also find the following information in the article, enabling you to have an exhilarating experience while seeing the moon, starts, constellations, and other heavenly bodies.
- Expectation versus realities regarding a telescope
- Things to know about your telescope
- Using your telescope to explore the sky
Telescope is an essential astronomy equipment. It is difficult for a beginner to get the best of a telescope at the beginning. That is why most telescopes end up in your house store, attic, and garage, rotting there forever. Similarly, some of you don’t find necessary information or help about what is the right way of using a telescope and making the most of it. The lack of required experience, knowledge, and expert assistance prevents you from getting the most enjoyment out of your telescope.
Experts at 10Wares have striven hard to make you fall in love with your telescope and thus, the sky by creating this guide. We have mostly shared simple tricks and tips, allowing you to become an adept stargazer in a short span of time.
As mentioned above, we have divided the guide into several sections to make it more beginner friendly in particular and user friendly in general.
So, let us move to our first section that is what to expect from a telescope.
Expectations versus Realities regarding a Telescope
Before learning how to use a telescope, it is appropriate to have a brief overview of the expectations you may have regarding your telescope. Unfortunately, many aspiring astronomers don’t even start or give up in days because of their unrealistic or too many expectations. For example, they believe the telescope will be a breeze to use. Or, their telescope will have tons of amazing features. Or, the bodies they see in the sky will be as spectacular as shown in the space magazines.
Most often, their telescopes fail to meet expectations or realty bites hard on their face. However, astronomy is still a very rewarding and exciting hobby that can pay rich dividends. All you need to do is to learn more about your telescope and how to properly use it.
Moving forward, we are going to explain some things you have to get right before starting star watching.
Never fully Trust Astronomy Magazines
In most cases, only two things attract people to astronomy. You may have been stunned by the beauty of starry night while looking at the night sky. Or, you have seen spectacular pictures of the moon, the sun, stars, asteroids, comets, galaxies, and nebulae in the magazines. Believe it or not, the space magazines only show the bright side of the astronomy, enticing you to buy a telescope and related accessories.
Some people do turn to magazine after being left speechless by the night sky. They want to find more about astronomy and sky in general. There is nothing wrong in buying a telescope after seeing the pictures in a magazine. Not everything they tell you is a lie. However, you need to keep two things in mind here.
A big enough telescope with good features will give you spellbinding views of the moon, planets, and starts. You may be lucky enough to spot galaxies and nebulae in a dark sky. However, the views will not be as enthralling as shown in the magazines.
Reality is always a bit harsh but you don’t need to lose hope. You don’t become an astronomer to have stunning pictures. It is all about the thrill and excitement of finding pinprick, faint, and tiny light that is actually a planet, start, or even a far off galaxy. To top it up, the feeling of watching bodies billions of light years away is just scintillating and not many people share it with you.
You Need to Improve Your Telescope
Most newcomers tend to buy cheap telescopes which is not inherently a bad thing. You should always start with the most economical telescope with as many features as possible. However, budget telescopes, apart from a few exceptions will always come with a smaller aperture, poor eyepieces and finderscope, and unstable mounts, etc. As gain more experience as an astronomer, you must start improving your telescope or replace it with a new and better one.
You can no doubt have awe striking sights of everything in the sky with your $100 telescope (we will explain how). However, you will get obsessed with those sights very quickly and want more from your telescope. You may even start finding faults with your current scope. This is high time you invest in a more expensive one.
Factors to Keep in Mind
There are certain criteria that will help you determine whether or not you need a new telescope.
- Your telescope is just fine if it has an aperture above 4 inches even if it is a real bargain scope. You can, in fact, see thousands of wonderful celestial bodies with that scope. You don’t need a new scope with a bigger aperture as yet.
- Many budget telescopes only feature one or two sizes of low quality eyepieces. Experts recommend using at least 3 sizes of Plossl eyepiece for the best performance. The smallest one will enable you to see the moon and planets. The midsize eyepiece is for nebulae and constellations and the largest one is for faint and deep sky bodies.
- There are two types of telescope mounts that are altazimuth mount and equatorial mount. The altazimuth mount movies up and down. The equatorial mount follows the line of stars across the sky. Every telescope under $500 will most likely have a lightweight mount which vibrates even in the slightest of wind. Replacing your telescope can cost you a lot of money. Therefore, it is advisable to buy a quality telescope with a good mount right away.
- Stargazing will be poor and underwhelming if you live in light-polluted area no matter you have the best telescope in the world. Firstly, you will not be able to see all the night sky objects. Secondly, they will be not as shiny as they are in a dark sky. You can use a light-pollution filter to improve the situation. It is better to find a darker site as it will considerably improve the enjoyment of doing astronomy.
Dress Properly… To Survive Cold
Telescopes highly magnify the heavenly objects because they are finely tuned instruments. They also love crystal clear, dark skies offering a clean view of the heavens. You cannot have the joy you want by looking at the starts through your windows. Similarly, you can also ruin your view by storing heat in the shed as it causes the air to glitter.
Therefore, the only option to truly enjoy astronomy is to place your telescope outside, preferably on your home’s roof. This can lead to cold and discomfort if you are not properly dressed and prepared.
Get These Extras
The following are some important telescope viewing tips or extras for beginners.
Bring a Chair
You would need a chair while stargazing because astronomy is synonymous with the solitude and spending a lot of time behind the eyepiece. So get comfortable and easy. This is the only way to properly observe the cosmos in its full glory.
Pack Warm Gear
Even the clearest of nights can get colder than you can imagine. Just because you are sitting idle behind an eyepiece does not mean you are not going to feel cold. Therefore, you must pack a lot of warm gears even if the days are relatively warmer than nights.
Never Forget Red Light
We also recommend using a red flashlight during astronomy. Your eyes may take up to 45 minutes to completely adapt to darkness. Your iris may snap shut within seconds of capturing a bright light. Therefore, some sort of red light will help you clearly see the starts right from the beginning.
Don’t Worry about Magnification
You should not worry about telescope magnification. Too much magnification can, in fact, ruin your stargazing experience in most cases. You can see everything clearly at 75-100% magnification with a decent scope and in a clear sky.
Try a Barlow Lens
A Barlow lens effectively doubles the focal length of your telescope. It is particularly useful for watching Mars, Jupiter, and Saturn on a clear night with no twinkling starts. Therefore, you can see the planets in high magnification using the same eyepiece.
Get a Planisphere
A Planisphere is an essential part of any telescope. Comprised of two disks, it brings all the sky into a very small space which you can easily deal with. You can see all the stars visible from your location through the rear disk. The front disk shows part of the rear disc through a window. Similarly, you can find the exact location of the starts at a certain date and time by setting the front disk.
Planispheres are very easy to use. You don’t need to have any prior knowledge, any specific technology, power, or WiFi to run them.
Important Accessories
You can observer greater contrast on the moon by using a good polarizer. Similarly, you can prevent due from accumulating on the telescope lens with the help of dew shields. Don’t forget extra power source if you have a motorized telescope. You should also take a notepad and pencil with you for taking notes and sketching.
Things to Know about Your Telescope
We assume you have already assembled your telescope according to the manufacturer’s directions. However, our guide about how to use a telescope also makes the job easier by providing you with some important telescope assembling tips.
- Always assemble your telescope indoors for the first time. You don’t necessarily have to put your telescope together in the dark because you would mostly use it in the night.
- Pick a big room with plenty of space to assemble the telescope.
- Also, have a good deal of patience because assembling a telescope can be a long and tedious process.
- Gather any tools you may need beforehand to get the job done successfully.
- Don’t take your telescope outdoors immediately after assembling it. Give yourself some time to learn more about its features and functions.
You should have the full idea of essential telescope equipment including the mounts, movement of your telescope, eyepieces, lenses, and finderscope. Let us study them one by one.
Telescope Mounts
As mentioned above, a telescope either mounts on an equatorial mount or altazimuth mount. What is the difference between the two? Let us find out.
Equatorial Mount
Your telescope has an equatorial mount if it has one or more counterweights. It is also the easiest way to tell what kind of mount your telescope has. The purpose of an equatorial mount is to track the movement of the stars across the sky. The location or latitude where you are watching the stars determine the shape of that arc. You can compensate for your latitude or location by adjusting the equatorial mount.
Equatorial mounts can be very simple or feature a lot of functions, components, and capabilities. Some of them have simple motors on both axis. On the other hand, others come with a highly advanced computerized system capable of handling huge observatory telescopes.
The following video explains how to align an equatorial mount.
Altazimuth Mounts
You may have already used an altazimuth mount if you own a camera tripod. Against common perception, it is the “movement of the head” perching on top of a tripod not its legs that makes a mount altazimuth. This is the most common type of mount you would normally find in cameras, spotting scopes, and point telescopes.
An altazimuth mount moves in upward, downward, left and right direction. In simple words, you can move it in straight lines. The simplest of altazimuth mounts have basic movement controls and are usually manual. However, some of the most advanced and high-tech telescopes use altazimuth mounts today. You can use whistles and mega balls to fully computerize them as well.
The following video explains how to use an altazimuth mount.
How Your Telescope Moves?
The telescope you choose will either have computerized “Go To” mounts or non-computerized mounts.
Non-Computerized Telescope Mounts
As the name suggests, you have to manually adjust the movement of a non-computerized telescope. You can do so by loosening the declination axes and right ascension in the case of equatorial mounts and on azimuth and altitude for the altazimuth mounts. Subsequently, push or pull the optical tube in the direction you want to take your telescope. Now re-lock the tube for preventing the telescope to move freely. This method is ideal for making sweeping or large movements across the sky.
Most non-computerized mounts come with one or two “slow motion control” knobs or cables you can use to make more incremental or small movements. You can easily keep the celestial objects in the field of view using slow motion controls. Similarly, you can also zero in a planet, star, or constellation when you are very close.
Computerized “Go To” Telescopes
Computerized telescopes include hand controllers you can use to move your telescope. How far you want to move the telescope across the sky will determine the slew rate and speed. Slower speeds enable you to keep the object or center it in the eyepiece. Faster speeds are best for moving from one body to another.
You should also experiment with all the buttons on the hand controllers in addition to trying out different speeds.
Another pro tip is to move telescope using different controls in a bright, well-lit place, preferably inside your home. Position adjustments are similar no matter you are using an equatorial mount or altazimuth mount.
Some computerized telescopes also allow you to move the telescope manually just like you do with hand controllers. However, you should always read your instruction manual first. Computerized telescopes can lose “their place” in the sky if you try to move them manually.
What is the Eyepiece in a Telescope?
No guide about how to use a telescope is complete without mentioning the eyepiece. The eyepiece is perhaps the most important accessory of any telescope. All the scopes come with at least one eyepiece irrespective of their type. Every celestial object emits light which is gathered and concentrated by a telescope into a single point. It is the eyepiece’s job to display the result for your enjoyment after processing the concentrated light. There are many varieties, focal lengths, and sizes of eyepieces just like telescope themselves.
Every eyepiece also has some number etched on it. What do those numbers mean?
In simple words, the numbers signify the focal length of the eyepiece. Magnification of your eyepiece depends on this focal length. Contrary to the common logic, smaller numbers on the eyepiece represent the higher magnification or more viewing power. The higher the numbers, smaller will be the magnification.
For example, your telescope includes two eyepieces, with focal lengths of 50 mm and 100 mm. Which of these eyepieces you will use for lower magnification? The correct answer is the eyepiece with 100 mm of focal length. There are many other things you need to learn about eyepieces. However, we restrict ourselves to the focal length for the sake of this guide.
How about a Barlow Lens?
You can also buy a Barlow lens as a very good accessory for your telescope. Sometimes, however, a Barlow lens come with the package. So, what does a Barlow lens do? Named after Peter Barlow, the Barlow lens cannot work indecently. Its only job is to increase the magnification of the eyepiece by 2 times or more. The multiplication capacity of a Barlow lens is etched on its barrel just like a focal length of an eyepiece. Most Barlow lenses multiply the magnification by 2 times only. For example, a Barlow lens will magnify the star by 300X if the focal length of the eyepiece provides magnification of 150X.
A Barlow lens is also very cheap and a great method of increasing your telescope’s magnification. For instance, you can have 8 different magnifications if you have 4 eyepieces and a Barlow lens. The installation is similar to that of an eyepiece. All you have to do is to insert it in your diagonal or focuser. The open end of the Barlow will host the eyepiece.
How to Align and Use a Viewfinder?
The next step in our how to use a telescope guide is to properly align and use a viewfinder. Believe it or not, the quality of your first stargazing session largely depends on this very simple step. Therefore, you must not skip this section at any cost.
A viewfinder helps you find celestial objects and thus, it is a very important accessory for your telescope. Lack of a finder means you will spend less time on looking at the objects and more time on finding them. It even becomes very difficult to view the moon, which is the brightest body in the sky, if you don’t have any finder. Similarly, it is very convenient to replace your factory finder if you come across a better one or prefer another finder.
Types of Viewfinder
Every telescope includes either an “optical finder” or a “red dot finder?” Let us see how they differ from each other in terms of construction, functions, and features.
The Red Dot Finder
A red dot finder offers zero magnification but a wide field of the night sky. You will look through a plastic or glass screen instead of an eyepiece. It is on this screen the red dot reflects the light. You can adjust the illuminated point in terms of its position on the screen as well as brightness.
A red dot finder operates on a battery which comes with the finder on most occasions. Sometimes, a sort of barrier such as a piece of thin film between the contact point and the battery results in the red dot not illuminating the screen. Be sure to remove the barrier if this is the case. Manufacturers cover new batteries in the film to protect them from running down. Turning the battery upside down will also enable you to accomplish the task.
You can attach red dot finders to telescope using elevated brackets. The bracket also increases the height of the finder, making it easier for you to look through it.
The Optical Finder
An optical finder is a complete telescope albeit very small in size. A finder bracket helps the optical finder to cling on to the top of the main telescope. Unlike a red dot finder, an optical finder offers a low magnification from 6X to 10X. On top of that, you can also center the object in its field of view with the help of a crosshair.
Most optical finders come with a focusing ring to adjust their focus. However, you can also focus the optical finder by moving the eyepiece itself. You can also choose from two types of optical finders that are right-angle finders and “straight-through” finders. The earlier makes the user see through the finder by looking down rather than looking through the line-of-sight by putting your eye behind the viewfinder.
How to Align Your Viewfinder?
Your viewfinder will be worthless if you don’t properly align it with your telescope. Figure out what kind of adjustment knobs your particular finder has. You will use thumbscrews to suspend optical finders in the bracket. The red dot finder has the adjustment knobs on its body.
Here is how you will align your finder.
- Install the both the finder bracket and the viewfinder as per the instruction manual.
- Put the eyepiece with the lowest magnification in the telescope’s focuser.
- Take your telescope outdoors during a day.
- Choose a location from where you can have a good view of a far off but a stationary object. Everything ranging from a lamp post, a stop sign, or an electrical pole will do. However, pick anything that is a good distance away and does not move at all.
- Now, manually point your telescope at the target as best as you can and look through the eyepiece. The target will already be in the field of view most of the time.
- You can make slight adjustments using the dials or slow motion control knobs to bring the object in the field of view if it is not already in it. Don’t forget to tighten the control knobs otherwise your mount will move.
- Now, try to center the target in the field of view as accurately as possible while looking through the viewfinder using the adjustment knobs on the bracket or finder itself.
- Look through the main eyepiece to check the view again. Move on to the next step if the object is still in the center of the viewfinder and you also have a Barlow lens or a second eyepiece available. However, you can skip this step and move on to the next one if you only have one eyepiece.
- Insert the Barlow on the current eyepiece or choose the eyepiece with next highest magnification and carefully insert it in the telescope while it is still locked down. Now repeat steps 3, 4, and 5 to accurately and precisely align your finderscope.
- Your finderscope is aligned if you have your target centered both in your eyepiece at the highest magnification and your finder. You can further tweak it when you are actually looking at the starts.
Things to Keep in Mind before Start Observing the Sky
You need much more than just a good telescope and accessories to have a successful observation session. There are a few more things you need to sort out before you head out. Similarly, you have to arrange some accessories necessary for elevating your success and enjoyment.
How Will You Find Heavenly Bodies?
The universe is bigger than you can ever imagine. Therefore, you must spend some time on figuring out how to find an object in this unlimited vastness. Do you have any equipment to use for directions? Are you going to use maps from AAA? Or, has your car a good navigation system? You must have one of these things in your arsenal. So, get it at the earliest.
There are many other options of finding celestial objects with the help of automatic Go To telescopes. Non-computerized telescopes have been in existence for centuries. People use them to find and view thousands of celestial bodies. Similarly, equatorial mount circle settings and even simple “star-hopping” will help you find numerous objects in the sky.
Naked Astronomy
Astronomy with the naked eye is the time tested but a limited way to observe the universe. The process is very simple. You look up in the sky and find something that catches your imagination. Subsequently, you point your telescope at the object. That is it. This is a perfect strategy to observe the moon, visible planets, the Orion Nebula, the Pleiades, the Great Cluster in the Hercules, and other bright objects in the deep sky. You can even view Andromeda Galaxy which is from an even darker location.
Unfortunately, you cannot see the majority of majestic celestial objects quite easily with the naked eye. Therefore, you will need one of the following astronomy guides sooner or later.
Star Charts and Atlases
A good atlas or star chart can considerably improve your stargazing experience. They have been like a Bible for amateur astronomers for time immemorial. You can either choose from laminated charts that lay flat on the surface or book charts. However, both types of charts have only one function. They represent certain areas of the sky in detail.
Every expert navigator or surveyor can find the location of a certain point on the earthly maps by locating its longitudes and latitudes which are marked on the map. The celestial maps, atlases, and charts work on the same principle. They have the equivalent of latitudes and longitudes, commonly referred to as declination and right ascension respectively, printed on them. Celestial navigators and astronomers find the celestial bodies using these ascensions and declinations.
You can find the latitudes and longitudes of any star or planet on these maps. Now use the equatorial mount’s circle settings to dial these coordinates and boom, you are looking at that object. It does take some time to master using circle settings but the effort it is worth it.
Planispheres
Planispheres are simple disc style displays that enable astronomers to find the latitudes of various celestial objects including constellations. They represent the exact location of a certain body at any given time in the sky. All you have to is to align the date with time and you can easily see your target constellation.
You can also “start hop” to other nebulae, star clusters, and more popular galaxies if you have a planisphere. Hold the planisphere in your hand after lining up the correct time and date. Now, orient yourself and match the planisphere with whatever you see in the sky. Start by finding the brightest stars in the sky. Now, visually hop to the next start and then next. Keep repeating the process and you will find the general location of your target object. Now, find that location in your finderscope. You will see that object in the field of view if the finderscope is aligned correctly.
Star charts and planispheres enable you to explore the sky even if you don’t have a telescope. Anyone who is interested in astronomy should be in the possession of these two important accessories. They will further enrich your experience by providing you with more knowledge of constellations.
Planetarium Software
It is also necessary to mention planetarium software in our how to use a telescope guide. These software enable you to explore the night sky for any time or date combination. You can find the location of the planets just by pressing a button. Or, you can get the bearings of the constellations within seconds with the help of these software.
Some applications also allow you to print the sky chart once you have it the way you want it. Now, you can go out with your telescope at the exact time and date your target object will be visible in the sky. However, modern planetarium software can do much more than that. You can also choose from a wide range of software both for Windows and Mac operating systems including TheSkyX Student Editions for Windows, TheSkyX Student Edition for Mac, TheSkyX Serious Edition for Windows, and TheSkyX Serious Edition for Mac.
Apps for Smart Devices
There are many apps for smart devices such as Android phones, tablets, iPads, and iPhones to practice astronomy as well. The most popular of these apps include SkySafari Pro, Star Chart, Star Walk, Celestron SkyPortal App, and Lunar Phase Pro. Some of these apps are highly advanced. They even give you the name of the celestial body you are observing when you point your smart device at it.
Computerized Telescopes
Another way of finding objects in the night sky is to have a computerized telescope. They have built-in navigation system making it really easy to locate celestial objects. You can observe thousands of bodies by pushing a few buttons because computerized telescopes have a large database of objects as well. Similarly, such telescopes can align themselves automatically with the sky.
Pick a Right Place to Observe
Your location plays a very important role in where you place your telescope. However, you must implement the following suggestions if you can.
- Find a perfectly level or near level surface
- Always go for dirt or grass if possible
- Elevated surfaces such as decks are an astronomer’s greatest enemy. They will vibrate when you will walk on them. Similarly, your telescope will also shake resulting in the blurred image.
- You can place your telescope on asphalt or concrete but on cooler days. They radiate heat on warmer days that distort the air, causing the image to shimmer.
- Try to switch off all the lights that may interrupt your image. Find the darkest place possible if you live in a light-polluted area. Only then you can enjoy the greatest views of the sky.
- You may also want to have the widest view of the sky while observing celestial objects. This can be difficult in the area with a lot of buildings or trees. However, you must not lose heart but try to find the best possible place.
What about the Seeing Conditions?
Seeing conditions can change without any warning and can have positive or negative effects on the observations. They can be so bad even in case of a clear sky that you cannot focus on even the low magnification views. You feel like Jupiter and Saturn are floating in the water. The seeing conditions can improve in the next hour enabling you to fully focus the same planets in your eyepiece with the highest magnification.
You live in a fool’s paradise if you think the focus will be sharp with any eyepiece on any object on any night. You can only make the most of your telescope and the accessories if you understand that seeing conditions can put objects out of focus the one moment and support high magnification the next. Therefore, it is imperative for you to look at the sky and check the seeing conditions before every observing session.
- Are the skies overcast or clear? The celestial object you have been looking at can suddenly disappear if there are clouds in the sky. Similarly, you won’t be able to see that object even if your Go To telescope insists it is there.
- Are the stars twinkling? If yes, are they twinkling from horizon to horizon or they are steady overhead. Twinkling start will mostly be steady overhead. If you move towards the horizon, the twinkling will increase because there will be more atmosphere to deal with. The seeing conditions are poor if stars are twinkling overhead. However, take your telescope out if they are almost steady to the horizon. This is because seeing conditions are perfect and you don’t know how long it will remain like that.
- High humidity can also result in poor sightseeing. Similarly, you must also consider dew. You can see stars in dew unless it gets heavy enough to affect all of your optics. However, you can plan accordingly if you know there is going to be dew at night.
- Is it particularly windy? A slight wind decreases the chances of dew. However, a strong wind can make your telescope shuffle in addition to degrading seeing conditions.
Use Your Telescope to Explore the Sky?
After taking care of everything ranging from setting up your telescope to checking the seeing conditions, it is now time to have your first amazing views. You should start with easiest objects such as the moon before moving on to more difficult ones.
How to Observe the Moon with a Telescope?
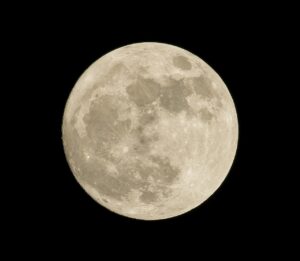
Looking at the moon through a telescope is a delightful experience. It is the brightest and easiest object to explore in the sky. The views will simply blow your mind away. You also don’t need to worry about the technicalities of your telescope. You just have to roughly align the viewfinder because the moon is such a big object that you can see it without any precision.
Similarly, you can also see the moon without polar aligning your equatorial mount telescope. However, you cannot move telescopes such as from Celestron NexStar range by hand. You have to carry out the StarAlign process to align them. This article explains how to use a Celestron telescope.
Just grab your telescope and point it at the moon whenever it is out and clearly visible. Take a look through the largest eyepiece in your telescope. It is easier to find the moon with the smaller magnification. Bring the moon’s feature into focus using the telescope’s knobs. The area where dark meets light on the lunar surface deserves your special attention. Known as the Terminator, this is the area where you can see craters in extreme detail. Shadows are also longest in this area.
The moon moves quickly across the sky. Therefore, you need to follow it using “slow motion controls” on your telescope. It will be easier with the polar aligned equatorial mount. However, it is not difficult to do so without it as well. As a matter of fact, you can use any telescope to see the moon surface.
Now swap the larger eyepiece with the smaller one. As the smaller eyepiece will have higher magnification, you need to refocus the moon. You can now only see a portion of the moon but the smallest of features will be clearly visible.
That is how to use a telescope to see the moon. It is now time to see your first planets.
Observe the Planets
Nearby planets such as Venus, Jupiter, and Saturn are the brightest bodies in the sky after the moon. These are also the most easily seen planets compared to the rest.
You can use the basic telescopes to locate Mercury and Mars but they are very hard to observe. Mercury is too close to the Sun. Mars, on the hand, is too faint and indistinct. New astronomers often get disappointed after seeing the Mars because they were hoping to view the bright red planet as portrayed in movies and news.
The views of the three brightest planets will take your breath away. You can see the Jupiter’s four Galilean moons and main bands at any given time, provided the seeing conditions are good. Similarly, you can also see Saturn’s famous rings with your telescope.
It is worth mentioning that these three planets are almost always out. Therefore, you should go outside and have a look. There are no excuses.
Explore the Stars
Stars are perhaps the most interesting part of the sky. You can see stars in different colors. You can even see some of the most distant stars with a common telescope. They are also a great test of your astronomy skills, especially the binary and double stars.
Although binary and double starts are different from each other yet they look same when looked through a telescope. Double stars may be hundreds of light years away from each other but they look close together from the earth. Binary stars, on the other hand, orbit each other.
Discover Messier Objects
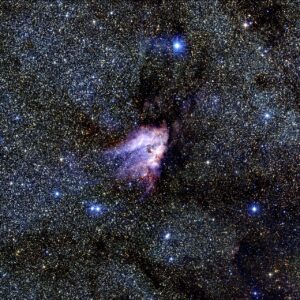
Messier 17 Nebulae
Messier Objects may be the most beautiful and awe inspiring objects in the sky. Charles Messier compiled a list of 110 astronomical objects including star clusters, galaxies, and nebulae in 1780.
You can see all of these objects with the naked eye if you know where to see in the dark sky. However, you can see them in more detail with your telescope. However, you should not set very high expectations. For example, the Andromeda Galaxy will look nothing like you see it in magazines even though it is the easiest to find. You will instead see a billion of stars only forming a gray blotch of light. However, the feeling of discovering something new is very rewarding in itself.
Which of the 110 Messier objects will be visible to you depends on the time of the year you are observing them. Read this article to find during which seasons you can see your favorite Messier objects.
Final Thoughts
With this we wrap up our guide about how to use a telescope. We have covered a lot of things ranging from setting your expectations, setting up and using your telescope, and observing the moon, starts, and Messier objects. We also hope you have learned enough to actually start observing the skies.


My spouse and I stumbled over here coming from a different web page and thought I might as well check things out.
I like what I see so i am just following you.
Look forward to looking into your web page yet again.